NBU 7.0 Oracle for AIX安装配置手册,详细介绍了NBU 7.0 AIX客户端安装配置,包括Oracle的备份配置。
NBU 7.0 Oracle for AIX安装配置手册,详细介绍了NBU 7.0 AIX客户端安装配置,包括Oracle的备份配置。
1、先设置客户端的hosts文件,包括备份服务器的hosts也要对应双向解析。
#[root@p550b:/]#more /etc/hosts
127.0.0.1 loopback localhost # loopback (lo0) name/address
10.10.10.1 p550a_boot1 p550a
20.20.20.1 p550a_boot2
172.16.1.7 p550a_per
10.10.10.2 p550b_boot1 p550b
20.20.20.2 p550b_boot2
172.16.1.8 p550b_per
172.16.1.9 ora_svr
=====NBU backup server=====
172.16.1.242 hpdl380-backup
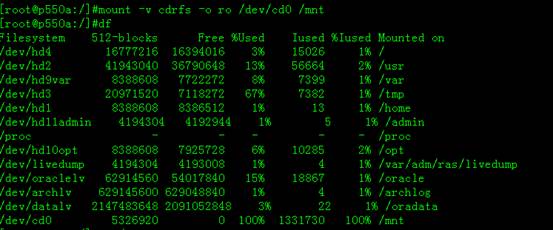
2、#放入NBU 7.0 For AIX光盘,在系统挂载安装盘
[root@p550a:/dev]#mount -v cdrfs -o ro /dev/cd0 /mnt
#loopmount -i /tmp/nbu/NB_7.0_AIX64.ISO -m /mnt -o "-V cdrfs -o ro"
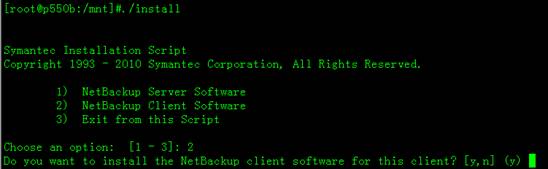
3、执行安装,并选择2客户端安装,提示选择Y继续
[root@p550a:/mnt]#./install
然后根据提示输入备份服务器的名称hpdl380-backup(一定要为备份服务器名,不建议用IP), 提示选择Y继续
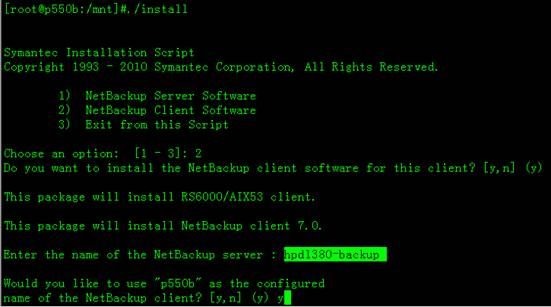
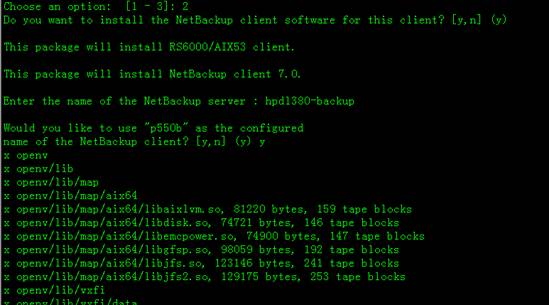
选择后则开始安装软件如下:
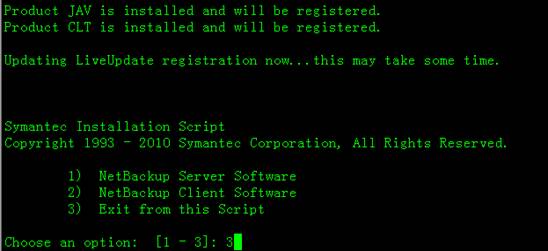
安装结束后选择3退出
 #p#副标题#e#
4、修改客户端NBU配置参数
[root@p550b:/usr/openv/netbackup]#vi bp.conf

修改双机HACMP系统一台P550的/usr/openv/netbackup/bp.conf配置文件信息
SERVER = hpdl380-backup
CLIENT_NAME = p550a
改为
SERVER = hpdl380-backup
CLIENT_NAME = ora_svr
REQUIRED_INTERFACE = ora_svr

5、修改客户端oracle数据库为归档模式
[root@p550b:/usr/openv/netbackup]#su - oracle
[oracle@p550b:/home/oracle]$sqlplus "/as sysdba"
SQL*Plus: Release 10.2.0.4.0 - Production on Fri Feb 25 15:48:48 2011
Copyright (c) 1982, 2007, Oracle. All Rights Reserved.
Connected to:
Oracle Database 10g Enterprise Edition Release 10.2.0.4.0 - 64bit Production
With the Partitioning, OLAP, Data Mining and Real Application Testing options
SQL> archive log list;
Database log mode Archive Mode
Automatic archival Enabled
Archive destination /oracle/product/10.2.0/dbs/arch
Oldest online log sequence 255
Next log sequence to archive 257
Current log sequence 257
SQL> shutdown immediate
Database closed.
Database dismounted.
ORACLE instance shut down.
SQL> startup mount;
ORACLE instance started.
Total System Global Area 1610612736 bytes
Fixed Size 2084400 bytes
Variable Size 436208080 bytes
Database Buffers 1157627904 bytes
Redo Buffers 14692352 bytes
Database mounted.
SQL> alter database archivelog;
Database altered.
SQL> alter system set log_archive_dest_1='location=/archlog' scope=spfile;
System altered.
SQL> shutdown immediate
Database closed.
Database dismounted.
ORACLE instance shut down.
SQL> startup
ORACLE instance started.
Total System Global Area 1610612736 bytes
Fixed Size 2084400 bytes
Variable Size 436208080 bytes
Database Buffers 1157627904 bytes
Redo Buffers 14692352 bytes
Database mounted.
Database opened.
SQL> archive log list;
Database log mode Archive Mode
Automatic archival Enabled
Archive destination /archlog
Oldest online log sequence 255
Next log sequence to archive 257
Current log sequence 257
SQL> create pfile from spfile;
File created.
至此oracle数据库归档开启完成;
6、oracle用户执行备份软件NBU和oracle数据库连接库程序oracle_link
[root@p550b:/]#su - oracle
[oracle@p550b:/home/oracle]$cd /usr/openv/netbackup/bin
[oracle@p550b:/usr/openv/netbackup/bin]$./oracle_link
提示选择Y继续
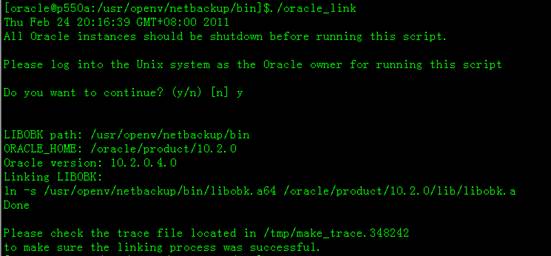
至此NBU的oracle数据库客户端安装完成;#p#副标题#e#
1、 先创建相关目录和文件
[root@p550b:/]#cd /usr/openv
[root@p550b:/usr/openv]#mkdir controlfile
[root@p550b:/usr/openv]#mkdir orascripts
[root@p550b:/usr/openv]#cd controlfile
[root@p550b:/usr/openv/controlfile]#touch control.ora
[root@p550b:/usr/openv/controlfile]#cd ..
[root@p550b:/usr/openv]#cd orascripts
[root@p550b:/usr/openv/orascripts]#touch aix_ora_full.sh
2、 相关目录和文件赋予属主和权限
[root@p550b:/usr/openv/orascripts]#cd ..
[root@p550b:/usr/openv]#ls -l
total 72
drwxr-xr-x 2 root system 256 Feb 25 16:03 controlfile
drwxr-xr-x 5 root bin 4096 Feb 25 15:40 java
drwxr-xr-x 7 root bin 8192 Feb 25 15:37 lib
drwxr-xr-x 5 root system 256 Feb 25 15:40 logs
drwxr-xr-x 2 root bin 256 Jan 05 2010 msg
drwxr-xr-x 8 root bin 4096 Feb 25 15:40 netbackup
drwxr-xr-x 2 root system 256 Feb 25 16:04 orascripts
-r--r--r-- 1 root bin 5435 Feb 25 15:40 regid.1992-11.com.symantec,Enterprise_netbackup-7.0.0.0_1.swidtag
drwxr-xr-x 2 root bin 4096 Jan 05 2010 resources
drwxr-xr-x 2 root bin 256 Jan 05 2010 share
-r--r--r-- 1 root bin 5435 Jan 05 2010 swidtag.xml
drwxr-xr-x 2 root bin 256 Feb 25 15:43 tmp
drwxr-xr-x 5 root bin 256 Feb 25 15:37 var
[root@p550b:/usr/openv]#chown -R oracle:dba controlfile
[root@p550b:/usr/openv]#chmod -R 777 controlfile
[root@p550b:/usr/openv]#chown -R oracle:dba orascripts
[root@p550b:/usr/openv]#chmod -R 777 orascripts
[root@p550b:/usr/openv]#ls -l
total 72
drwxrwxrwx 2 oracle dba 256 Feb 25 16:03 controlfile
drwxr-xr-x 5 root bin 4096 Feb 25 15:40 java
drwxr-xr-x 7 root bin 8192 Feb 25 15:37 lib
drwxr-xr-x 5 root system 256 Feb 25 15:40 logs
drwxr-xr-x 2 root bin 256 Jan 05 2010 msg
drwxr-xr-x 8 root bin 4096 Feb 25 15:40 netbackup
drwxrwxrwx 2 oracle dba 256 Feb 25 16:04 orascripts
-r--r--r-- 1 root bin 5435 Feb 25 15:40 regid.1992-11.com.symantec,Enterprise_netbackup-7.0.0.0_1.swidtag
drwxr-xr-x 2 root bin 4096 Jan 05 2010 resources
drwxr-xr-x 2 root bin 256 Jan 05 2010 share
-r--r--r-- 1 root bin 5435 Jan 05 2010 swidtag.xml
drwxr-xr-x 2 root bin 256 Feb 25 15:43 tmp
drwxr-xr-x 5 root bin 256 Feb 25 15:37 var#p#副标题#e#
3、 编辑NBU备份数据库的Rman脚本aix_ora_full.sh
[root@p550b:/usr/openv/orascripts]#vi aix_ora_full.sh
粘贴如下内容(完全备份oracle数据库和归档日志,并删除备份好的归档日志,注意修改实例名oracle_sid和oracle_home和实际环境一致)
=================================================================
#!/bin/sh
# $Header: hot_database_backup.sh,v 1.9 2002/02/06 16:48:56 lstrub Stab $
#
#bcpyrght
#***************************************************************************
#* $VRTScprght: Copyright 1993 - 2002 VERITAS Software Corporation, All Rights Reserved $ *
#***************************************************************************
#ecpyrght
#
# ---------------------------------------------------------------------------
# hot_database_backup.sh
# ---------------------------------------------------------------------------
# This script uses Recovery Manager to take a hot (inconsistent) database
# backup. A hot backup is inconsistent because portions of the database are
# being modified and written to the disk while the backup is progressing.
# You must run your database in ARCHIVELOG mode to make hot backups. It is
# assumed that this script will be executed by user root. In order for RMAN
# to work properly we switch user (su -) to the oracle dba account before
# execution. If this script runs under a user account that has Oracle dba
# privilege, it will be executed using this user's account.
# ---------------------------------------------------------------------------
# ---------------------------------------------------------------------------
# Determine the user which is executing this script.
# ---------------------------------------------------------------------------
CUSER=`id |cut -d"(" -f2 | cut -d ")" -f1`
# ---------------------------------------------------------------------------
# Put output in <this file name>.out. Change as desired.
# Note: output directory requires write permission.
# ---------------------------------------------------------------------------
RMAN_LOG_FILE=${0}.`date +%Y%m%d%H%M%S`.out
# ---------------------------------------------------------------------------
# You may want to delete the output file so that backup information does
# not accumulate. If not, delete the following lines.
# ---------------------------------------------------------------------------
if [ -f "$RMAN_LOG_FILE" ]
then
rm -f "$RMAN_LOG_FILE"
fi
# -----------------------------------------------------------------
# Initialize the log file.
# -----------------------------------------------------------------
echo >> $RMAN_LOG_FILE
chmod 666 $RMAN_LOG_FILE
# ---------------------------------------------------------------------------
# Log the start of this script.
# ---------------------------------------------------------------------------
echo Script $0 >> $RMAN_LOG_FILE
echo ==== started on `date` ==== >> $RMAN_LOG_FILE
echo >> $RMAN_LOG_FILE
# ---------------------------------------------------------------------------
# Replace /db/oracle/product/ora81, below, with the Oracle home path.
# ---------------------------------------------------------------------------
ORACLE_HOME=/oracle/product/10.2.0
export ORACLE_HOME
# ---------------------------------------------------------------------------
# Replace ora81, below, with the Oracle SID of the target database.
# ---------------------------------------------------------------------------
ORACLE_SID=orclyw
export ORACLE_SID
# ---------------------------------------------------------------------------
# Replace ora81, below, with the Oracle DBA user id (account).
# ---------------------------------------------------------------------------
ORACLE_USER=oracle
# ---------------------------------------------------------------------------
# Set the target connect string.
# Replace "sys/manager", below, with the target connect string.
# ---------------------------------------------------------------------------
TARGET_CONNECT_STR= /
# ---------------------------------------------------------------------------
# Set the Oracle Recovery Manager name.
# ---------------------------------------------------------------------------
RMAN=$ORACLE_HOME/bin/rman
# ---------------------------------------------------------------------------
# Print out the value of the variables set by this script.
# ---------------------------------------------------------------------------
echo >> $RMAN_LOG_FILE
echo "RMAN: $RMAN" >> $RMAN_LOG_FILE
echo "ORACLE_SID: $ORACLE_SID" >> $RMAN_LOG_FILE
echo "ORACLE_USER: $ORACLE_USER" >> $RMAN_LOG_FILE
echo "ORACLE_HOME: $ORACLE_HOME" >> $RMAN_LOG_FILE
# ---------------------------------------------------------------------------
# Print out the value of the variables set by bphdb.
# ---------------------------------------------------------------------------
echo >> $RMAN_LOG_FILE
echo "NB_ORA_FULL: $NB_ORA_FULL" >> $RMAN_LOG_FILE
echo "NB_ORA_INCR: $NB_ORA_INCR" >> $RMAN_LOG_FILE
echo "NB_ORA_CINC: $NB_ORA_CINC" >> $RMAN_LOG_FILE
echo "NB_ORA_SERV: $NB_ORA_SERV" >> $RMAN_LOG_FILE
echo "NB_ORA_POLICY: $NB_ORA_POLICY" >> $RMAN_LOG_FILE
# ---------------------------------------------------------------------------
# NOTE: This script assumes that the database is properly opened. If desired,
# this would be the place to verify that.
# ---------------------------------------------------------------------------
echo >> $RMAN_LOG_FILE
# ---------------------------------------------------------------------------
# If this script is executed from a NetBackup schedule, NetBackup
# sets an NB_ORA environment variable based on the schedule type.
# The NB_ORA variable is then used to dynamically set BACKUP_TYPE
# For example, when:
# schedule type is BACKUP_TYPE is
# ---------------- --------------
# Automatic Full INCREMENTAL LEVEL=0
# Automatic Differential Incremental INCREMENTAL LEVEL=1
# Automatic Cumulative Incremental INCREMENTAL LEVEL=1 CUMULATIVE
#
# For user initiated backups, BACKUP_TYPE defaults to incremental
# level 0 (full). To change the default for a user initiated
# backup to incremental or incremental cumulative, uncomment
# one of the following two lines.
# BACKUP_TYPE="INCREMENTAL LEVEL=1"
# BACKUP_TYPE="INCREMENTAL LEVEL=1 CUMULATIVE"
#
# Note that we use incremental level 0 to specify full backups.
# That is because, although they are identical in content, only
# the incremental level 0 backup can have incremental backups of
# level > 0 applied to it.
# ---------------------------------------------------------------------------
if [ "$NB_ORA_FULL" = "1" ]
then
echo "Full backup requested" >> $RMAN_LOG_FILE
BACKUP_TYPE="INCREMENTAL LEVEL=0"
elif [ "$NB_ORA_INCR" = "1" ]
then
echo "Differential incremental backup requested" >> $RMAN_LOG_FILE
BACKUP_TYPE="INCREMENTAL LEVEL=1"
elif [ "$NB_ORA_CINC" = "1" ]
then
echo "Cumulative incremental backup requested" >> $RMAN_LOG_FILE
BACKUP_TYPE="INCREMENTAL LEVEL=1 CUMULATIVE"
elif [ "$BACKUP_TYPE" = "" ]
then
echo "Default - Full backup requested" >> $RMAN_LOG_FILE
BACKUP_TYPE="INCREMENTAL LEVEL=0"
fi
# ---------------------------------------------------------------------------
# Call Recovery Manager to initiate the backup. This example does not use a
# Recovery Catalog. If you choose to use one, replace the option 'nocatalog'
# from the rman command line below with the
# 'rcvcat <userid>/<passwd>@<tns alias>' statement.
#
# Note: Any environment variables needed at run time by RMAN
# must be set and exported within the switch user (su) command.
# ---------------------------------------------------------------------------
# Backs up the whole database. This backup is part of the incremental
# strategy (this means it can have incremental backups of levels > 0
# applied to it).
#
# We do not need to explicitly request the control file to be included
# in this backup, as it is automatically included each time file 1 of
# the system tablespace is backed up (the inference: as it is a whole
# database backup, file 1 of the system tablespace will be backed up,
# hence the controlfile will also be included automatically).
#
# Typically, a level 0 backup would be done at least once a week.
#
# The scenario assumes:
# o you are backing your database up to two tape drives
# o you want each backup set to include a maximum of 5 files
# o you wish to include offline datafiles, and read-only tablespaces,
# in the backup
# o you want the backup to continue if any files are inaccessible.
# o you are not using a Recovery Catalog
# o you are explicitly backing up the control file. Since you are
# specifying nocatalog, the controlfile backup that occurs
# automatically as the result of backing up the system file is
# not sufficient; it will not contain records for the backup that
# is currently in progress.
# o you want to archive the current log, back up all the
# archive logs using two channels, putting a maximum of 20 logs
# in a backup set, and deleting them once the backup is complete.
#
# Note that the format string is constructed to guarantee uniqueness and
# to enhance NetBackup for Oracle backup and restore performance.
#
#
# NOTE WHEN USING TNS ALIAS: When connecting to a database
# using a TNS alias, you must use a send command or a parms operand to
# specify environment variables. In other words, when accessing a database
# through a listener, the environment variables set at the system level are not
# visible when RMAN is running. For more information on the environment
# variables, please refer to the NetBackup for Oracle Admin. Guide.
#
# ---------------------------------------------------------------------------
CMD_STR="
ORACLE_HOME=$ORACLE_HOME
export ORACLE_HOME
ORACLE_SID=$ORACLE_SID
export ORACLE_SID
$RMAN target / nocatalog msglog $RMAN_LOG_FILE append << EOF
RUN {
ALLOCATE CHANNEL ch00 TYPE 'SBT_TAPE';
SEND 'NB_ORA_POLICY=aix_ora_full';
BACKUP
$BACKUP_TYPE
SKIP INACCESSIBLE
TAG hot_db_bk_level0
FILESPERSET 30
# recommended format
FORMAT 'bk_%s_%p_%t'
DATABASE;
sql 'alter system archive log current';
RELEASE CHANNEL ch00;
# backup all archive logs
ALLOCATE CHANNEL ch00 TYPE 'SBT_TAPE';
SEND 'NB_ORA_POLICY=aix_ora_full';
BACKUP
filesperset 20
FORMAT 'al_%s_%p_%t'
ARCHIVELOG ALL DELETE INPUT;
RELEASE CHANNEL ch00;
#
# Note: During the process of backing up the database, RMAN also backs up the
# control file. This version of the control file does not contain the
# information about the current backup because "nocatalog" has been specified.
# Too include the information about the current backup, the control file should
# be backed up as the last step of the RMAN section. This step would not be
# necessary if we were using a recovery catalog.
#
ALLOCATE CHANNEL ch00 TYPE 'SBT_TAPE';
BACKUP
# recommended format
FORMAT 'cntrl_%s_%p_%t'
CURRENT CONTROLFILE;
RELEASE CHANNEL ch00;
ALLOCATE CHANNEL ch00 TYPE DISK ;
COPY
CURRENT CONTROLFILE to '/usr/openv/controlfile/control.ora';
RELEASE CHANNEL ch00;
}
EOF
"
# Initiate the command string
if [ "$CUSER" = "root" ]
then
su - $ORACLE_USER -c "$CMD_STR" >> $RMAN_LOG_FILE
RSTAT=$?
else
/usr/bin/sh -c "$CMD_STR" >> $RMAN_LOG_FILE
RSTAT=$?
fi
# ---------------------------------------------------------------------------
# Log the completion of this script.
# ---------------------------------------------------------------------------
if [ "$RSTAT" = "0" ]
then
LOGMSG="ended successfully"
/usr/openv/netbackup/bin/bpbackup -p oracle_control_file -s user -t 0 /usr/openv/controlfile/control.ora
else
LOGMSG="ended in error"
fi
echo >> $RMAN_LOG_FILE
echo Script $0 >> $RMAN_LOG_FILE
echo ==== $LOGMSG on `date` ==== >> $RMAN_LOG_FILE
echo >> $RMAN_LOG_FILE
exit $RSTAT
==================================================================
[root@p550b:/usr/openv/orascripts]#ls -l
total 32
-rwxrwxrwx 1 oracle dba 11764 Feb 25 16:12 aix_ora_full.sh
至此NBU的oracle数据库客户端脚本设置完成;#p#副标题#e#
NBU安装后需要设置一个catalog目录备份作业,已保证NBU备份内部数据库损坏可以还原。
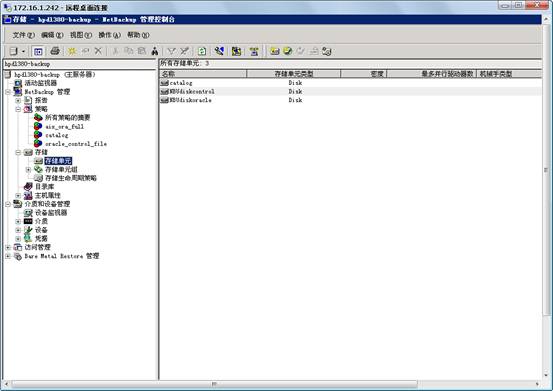
1、先创建好三个存储单元,catalog、NBUdiskcontrol、NBUdiskoracle
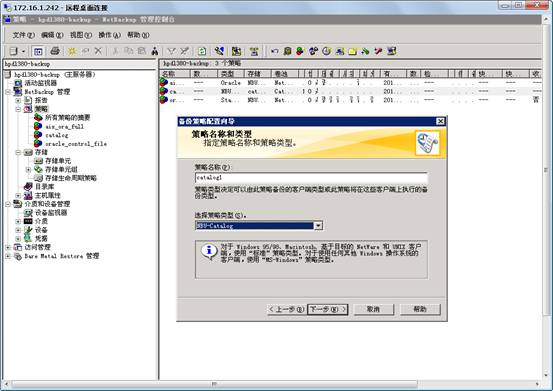
新建策略,并使用备份向导,策略名称为catalog
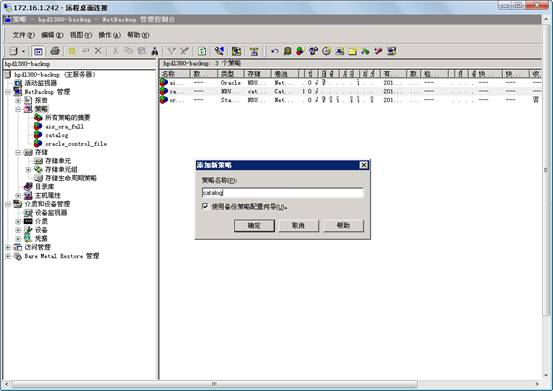
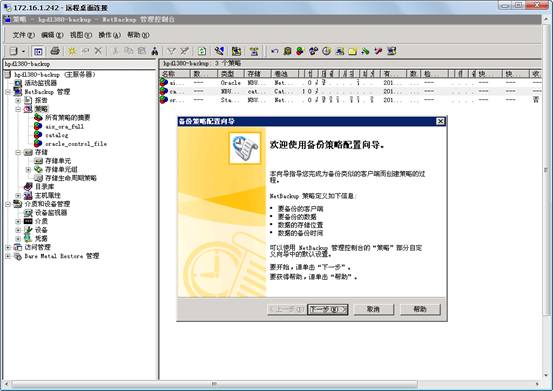
选择策略类型为NBU-Catalog
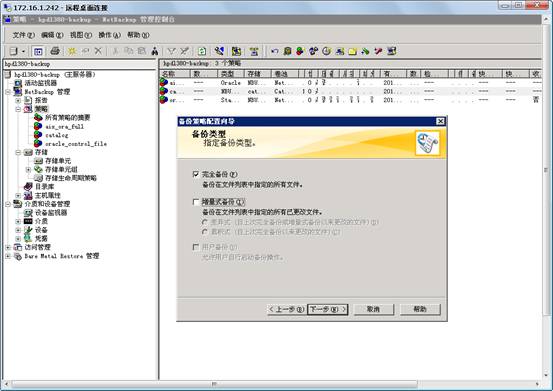
选择完全备份
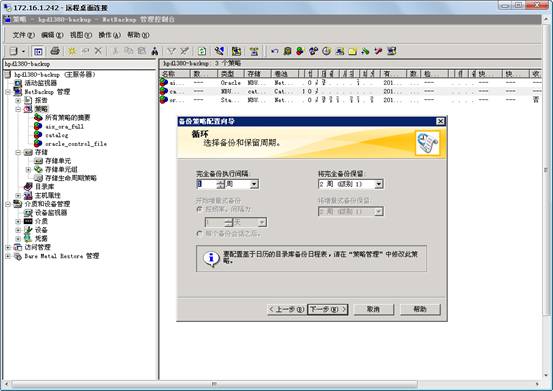
默认完全备份执行间隔一周,如下图
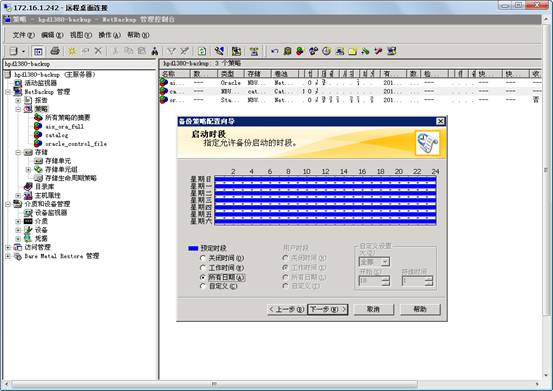
默认启动时间段全选
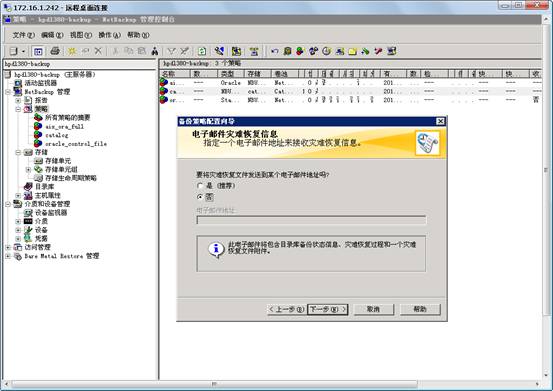
在本地其他目录选择个灾难恢复位置,相当于异地再保存一份,可以为本地或异地位置
本例为本地磁盘E:NBUdiskcatalogrecovery

邮件选择否,如下图
下一步点击完成即可,如下图
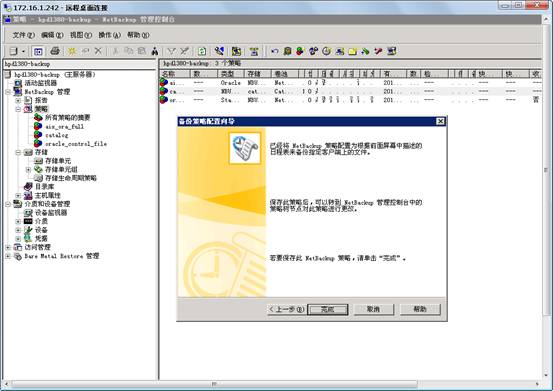
至此NBU的catalog目录库备份设置完成;#p#副标题#e#
四、NBU 7.0 oracle for aix备份作业设置
NBU备份客户端需要设置两个策略,一个备份oracle的控制文件oracle_control_file
另一个为oracle的全库备份aix_ora_full
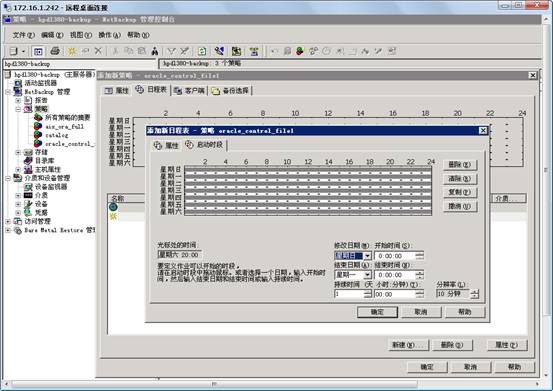
1、在备份服务器上新建一个为策略名oracle_control_file,(选择类型为standard)

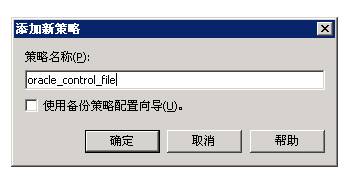
(选择类型为standard)
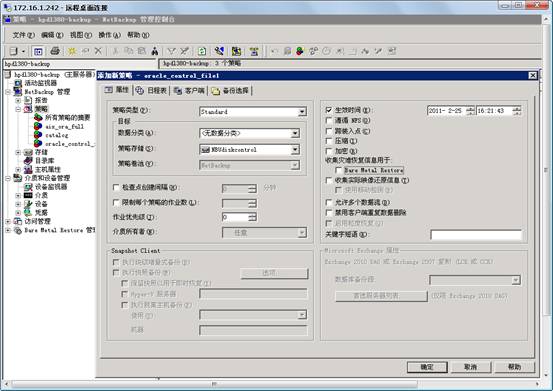
并且里面日程表名称为user,为用户备份模式,和脚本 -s user 对应就可以了

启动时段为全部时间段
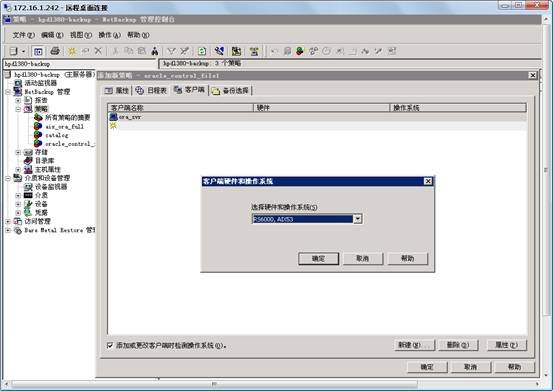
输入客户端为虚拟节点名称ora_svr,并选择对应操作系统版本
选择刚创建的control.ora文件,位置/usr/openv/controlfile/control.ora
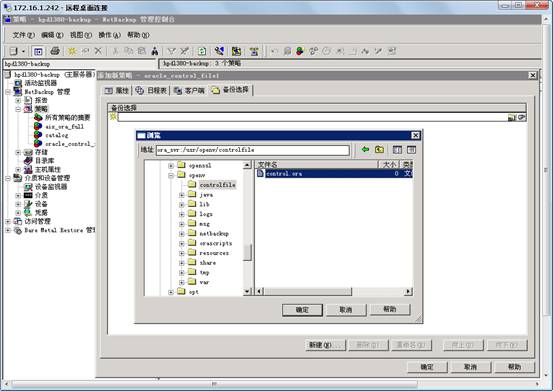
确定选择后如图

2、在备份服务器上新建一个为策略名aix_ora_full,(选择类型为oracle)
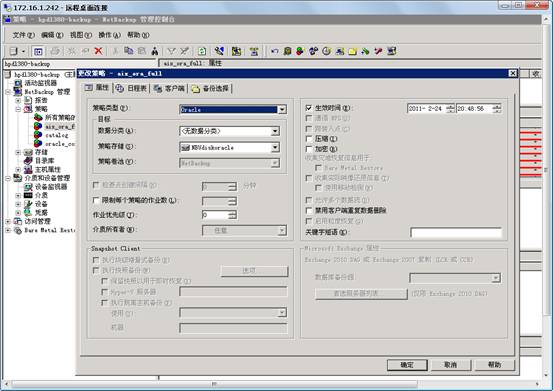
日程表名称也为aix_ora_full,保留一个月

启动时间段为每天20:00开始备份,到早上6:00为备份时间窗口
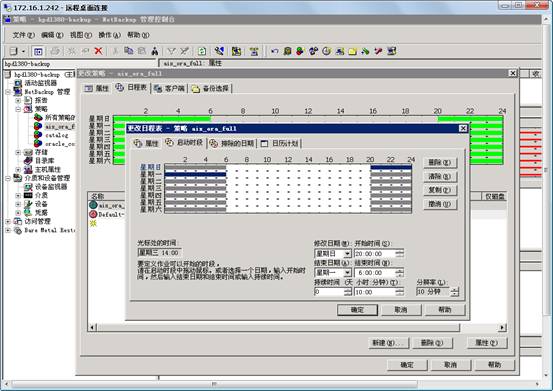
日历计划选择全置,相当于每天的晚上20:00开始做一个完全备份
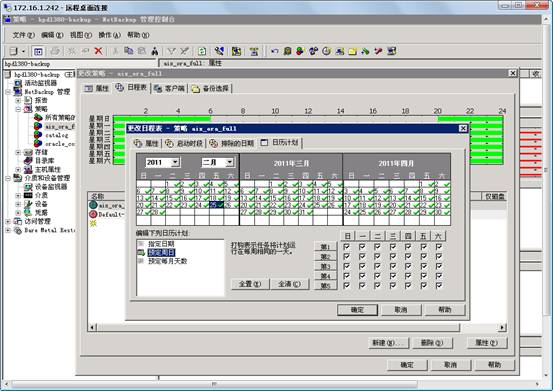
设置好后如下图,Default-Application-Backup为默认有的,不用设置,只要根据备份数据保留周期,修改保留周期即可。

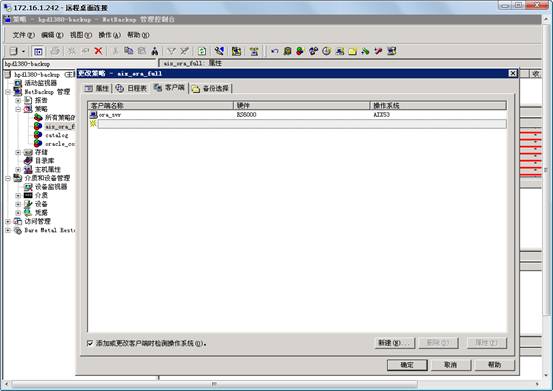
客户端还是输入虚拟节点名称ora_svr,并选择对应操作系统版本
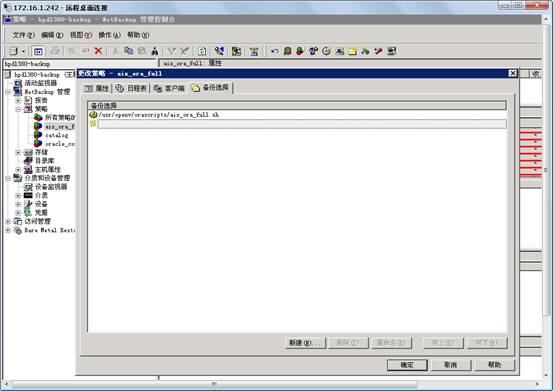
备份内容为另外创建好的数据库全备脚本aix_ora_full.sh即可。
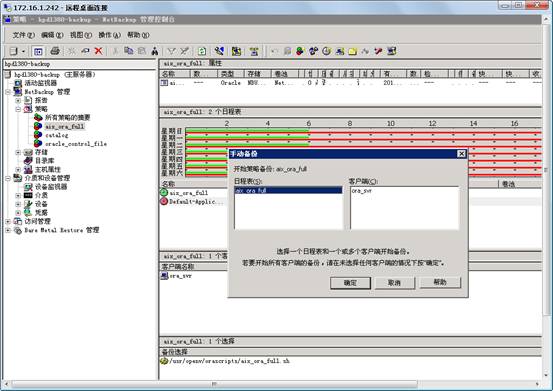
可以手工备份发起测试。


至此NBU备份oracle for aix作业策略设置完成;
声明: 此文观点不代表本站立场;转载须要保留原文链接;版权疑问请联系我们。