本文介绍CentOS5.9系统安装配置Apache+PHP+MySQL环境,希望对于初学Apache服务器相关的朋友有帮助,更多Apache安装、配置、报错处理等资源请本站内搜索。
今天主要讲一下centos5.5用yum安装配置php环境,主要安装的有apache、php、mysql、phpMyAdmin。下面是安装php环境的准备工作和安装步骤:
一、安装centos5.5操作系统
CentOS 开发社区已发布了新的 5.5 版本。CentOS 5.5 基于 Red Hat Enterpris Linux 5.5.0,其中包括 Kernel 2.6.18、Apache 2.2、PHP 5.1.6、MySQL 5.0、PostgreSQL 8、GNOME 2.16、KDE 3.5、OpenOffice.org 2.3、Firefox 3.0、Evolution 2.12 等等。此外,CentOS 5.3 更新了美工设计,并根据用户的请求恢复了 Contrib 仓库。
CentOS 5.5 支持 i386 及 x86_64 架构,其 ISO 映像可从以下地址获取。
二、系统安装
安装CentOS 5.5是做服务器,所以没有用的,一概不装;具体哪些不装,自己看着办吧:
三、安装Apache+php+Mysql
1、更新系统内核到最新. yum -y update
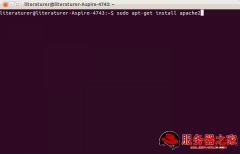
安装Apahce, PHP, Mysql, 以及php连接mysql库组件
yum -y install httpd php mysql mysql-server php-mysql
2、安装mysql扩展
yum -y install mysql-connector-odbc mysql-devel libdbi-dbd-mysql
或一次性粘贴安装:
yum -y install httpd php mysql mysql-server php-mysql httpd-manual mod_ssl mod_perl mod_auth_mysql php-mcrypt php-gd php-xml php-mbstring php-ldap php-pear php-xmlrpc mysql-connector-odbc mysql-devel libdbi-dbd-mysql
3、设置mysql数据库root帐号密码。
mysqladmin -u root password ‘newpassword’
"newpassword" 代表的是你想要设置的密码,新安装的mysql的root根用户密码默认为空,设置密码后可以让mysql数据库更安全
mysql -u root -p (此时会要求你输入刚刚设置的密码,输入后回车即可)
mysql> DROP DATABASE test; (删除test数据库)
mysql> DELETE FROM mysql.user WHERE user = ”; (删除匿名帐户)
mysql> FLUSH PRIVILEGES; (重载权限)
4、按照以上的安装方式, 配置出来的默认站点目录为/var/www/html/新建一个php脚本:
<?php
phpinfo();
?>
四、 配置防火墙
添加允许访问HTTP、FTP端口
iptables -I RH-Firewall-1-INPUT -m state --state NEW -m tcp -p tcp --dport 21 -j ACCEPT
iptables -I RH-Firewall-1-INPUT -m state --state NEW -m tcp -p tcp --dport 80 -j ACCEPT
重启iptables: service iptables restart
五、安装phpMyAdmin
进入phpMyAdmin官方下载phpMyAdmin,3.1以上需php 5.2以上,上传到你的网站目录下,然后进行配置。只需几步即可搞定。
config.sample.inc.php更名为config.inc.php,然后打开config.inc.php文件,进行以下修改;
// $cfg['Servers'][$i]['controluser'] = ‘pma’;
// $cfg['Servers'][$i]['controlpass'] = ‘pmapass’;
// $cfg['Servers'][$i]['pmadb'] = ‘phpmyadmin’;
// $cfg['Servers'][$i]['bookmarktable'] = ‘pma_bookmark’;
// $cfg['Servers'][$i]['relation'] = ‘pma_relation’;
// $cfg['Servers'][$i]['table_info'] = ‘pma_table_info’;
// $cfg['Servers'][$i]['table_coords'] = ‘pma_table_coords’;
// $cfg['Servers'][$i]['pdf_pages'] = ‘pma_pdf_pages’;
// $cfg['Servers'][$i]['column_info'] = ‘pma_column_info’;
// $cfg['Servers'][$i]['history'] = ‘pma_history’;
// $cfg['Servers'][$i]['designer_coords'] = ‘pma_designer_coords’;
去掉每行前面的//注释
$cfg['blowfish_secret'] = ”; |修改为| $cfg['blowfish_secret'] = ‘http’;
$cfg['Servers'][$i]['controluser'] = ‘pma’; |把’pma’修改为你的帐号|$cfg['Servers'][$i]['controlpass'] = ‘pmapass’; |把’pmapass设置为你的mysql登录密码
$cfg['blowfish_secret'] = ”; | 添加短语密码例如:$cfg['blowfish_secret'] = ‘onohot’;
六、安装php的扩展
yum -y install php-gd php-xml php-mbstring php-ldap php-pear php-xmlrpc
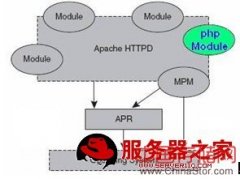
七、安装apache扩展
yum -y install httpd-manual mod_ssl mod_perl mod_auth_mysql
到此为止centos5.3下的php环境基本就配置完成了,用命令启动服务即可使用。
八、如果想升级PHP的话
提及php需要升级到5.2以上,而centos 5.x目前提供php版本为5.1.6,
通过以下方法升级PHP到5.2比较方便,现推荐给大家。
[utterramblings]
name=Jason's Utter Ramblings Repo
baseurl=http://www.jasonlitka.com/media/EL$releasever/$basearch/
enabled=1
gpgcheck=1
gpgkey=http://www.jasonlitka.com/media/RPM-GPG-KEY-jlitka
执行命令,自动升级。
yum update php -y
yum install libmcrypt -y
声明: 此文观点不代表本站立场;转载须要保留原文链接;版权疑问请联系我们。