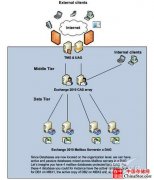
本系列文章我们将以Windows Server 2012作为基础平台来进行Exchange Server 2013的部署演示。
Exchange Server 2013可以部署到Windows Server 2012当中,本系列文章我们将以Windows Server 2012作为基础平台来进行Exchange Server 2013的部署演示。
Windows Server 2012支持Exchange 2013的所有服务器角色,与Windows Server 2008 R2不同的是:Windows Server 2012标准版也可以作为部署Exchange Server 2013邮箱服务器角色DAG的成员。
在正式开始之前,我们再次提醒各位需要至少满足如下条件:
· 请确保您的森林级别至少是Windows Server 2003,并且Schema Master至少运行在Windows Server 2003 with SP1或更高版本的Windows上
· 部署Exchange Server 2013的服务器必需已经加入到域
· 一些先决条件,要求你重新启动服务器以完成安装
Active Directory先决条件准备
在部署Exchange 2013之前,活动目录必需也要提前满足一些先决条件,请先在域控上安装下列软件:
1、Microsoft .NET Framework 4.5
2、Windows Management Framework 3.0
注意:由于NET Framework 4.5和Windows Management Framework 3.0已经包括在Windows Server 2012中了,在此步中我们不需要手动安装。
3、安装远程工具管理包 在我们已经加入域的Windows Server 2012的PowerShell中执行如下命令进行安装:
|
|
|

Exchange Server 2013邮箱服务器角色先决条件准备
部署Exchange 2013邮箱服务器角色的Windows Server 2012需要满足如下条件:
1、将Windows Server 2012加入域
2、在PowerShell中执行如下命令安装一些必要角色
|
|
|

重启服务器
3、安装Microsoft Unified Communications Managed API 4.0, Core Runtime 64-bit

4、安装Microsoft Office 2010 Filter Pack 64 bit

5、安装Microsoft Office 2010 Filter Pack SP1 64 bit

6、在PowerShell中执行如下命令启用任务计划
|
|
|

Exchange Server 2013客户端访问服务器角色先决条件准备
部署Exchange 2013客户端访问服务器角色的Windows Server 2012需要满足如下条件:
1、将Windows Server 2012加入域
2、在PowerShell中执行如下命令安装一些必要角色
|
|
|

3、安装Microsoft Unified Communications Managed API 4.0, Core Runtime 64-bit
4、在Windows Firewall中开放139端口 您可以自己通过图形图面来进行更改,也可以使用我下面这条命令来添加139端口的访问策略
|
|
|

其它提前条件
1、您还需要在要安装Exchange Server 2013的服务器上删除Microsoft Visual C++ Beta Redistributable

由此,我们就已经准备好了部署Exchange 2013的所有前提条件。下篇文章我们将开始正式部署Exchange Server 2013!
声明: 此文观点不代表本站立场;转载须要保留原文链接;版权疑问请联系我们。
