本文介绍CentOS系统分别编译安装Nginx+PHP前端和MySQL服务,希望对于初学Nginx服务器相关的朋友有帮助,更多Nginx安装、配置、报错处理等资源请本站内搜索。。
前端(nginx+php)ip:192.168.10.8
后端(独立mysql)ip:192.168.10.5
软件版本:libiconv-1.14.tar.gz mysql-5.1.63.tar.gz php-5.2.17.tar.gz php-5.2.17-fpm-0.5.14.diff.gz php-5.2.17-max-input-vars.patch
1.先在后端安装mysql
在192.168.10.5上只安装mysql.方法可以去看centos编译安装nginx+php-fpm+mysql里的mysql安装.
2.在前端安装php-fpm nginx和mysql-client
这里只说下安装mysql-client和php的编译安装.
tar zxf mysql-5.1.63.tar.gz && cd mysql-5.1.63
./configure --prefix=/usr/local/mysql --without-server
这里只需要加上--without-server就可以让mysql变成客户端了.
如果出现/bin/rm: cannot remove `libtoolt': No such file or directory,可以去看这篇文章Mysql安装:/bin/rm: cannot remove `libtoolt': No such file or directory.
没有问题后,执行命令:
make && make install
编译php的时候只需要加上--with-mysql=mysql客户端安装目录就可以了.这里我给出编译参数:
./configure --prefix=/usr/local/php --enable-fastcgi --enable-fpm --with-fpm-log=/var/log/php-fpm.log
--with-fpm-conf=/etc/php-fpm.conf --with-fpm-pid=/var/run/php-fpm.pid --with-config-file-path=/etc
--with-config-file-scan-dir=/etc/php.d --with-openssl --with-zlib --enable-bcmath --with-bz2 --with-curl
--enable-ftp --with-gd --enable-gd-native-ttf --with-jpeg-dir --with-png-dir --with-gettext --with-mhash
--enable-mbstring --with-mcrypt --enable-soap --enable-zip --with-iconv=/usr/local/libiconv
--with-mysql=/usr/local/mysql --with-mysqli=/usr/local/mysql/bin/mysql_config --without-pear
nginx的编译没有什么好说的了,我前面centos编译安装nginx+php-fpm+mysql这篇文章里已经有讲过了.
3.进行测试验证
当上面的一切都安装好之后,在后端的mysql里给出远程权限,如下:
GRANT ALL PRIVILEGES ON *.* TO 'root'@'%' IDENTIFIED BY '123456';
然后iptables上只允许192.168.10.8访问mysql端口,其他都拒绝.如:
iptables -A RH-Firewall-1-INPUT -s 192.168.10.8 -p tcp -m tcp --dport 3306 -j ACCEPT
iptables -A RH-Firewall-1-INPUT -p tcp --dport 3306 -j DROP
services iptables save
services iptables restart
然后在192.168.10.8上进行测试,是否可以远程连上mysql
mysql -h 192.168.10.5 -u root -p
如果可以连上,就继续下一步的操作,不能连上的话请检查上面是否有错误的地方.
现在我们加个php页面来测试php是否可以连上mysql,脚本如下:
<?php
$link=mysql_connect("192.168.10.5","root","123456");
if(!$link) echo "bad!" ;
else echo "ok!" ;
mysql_close();
?>
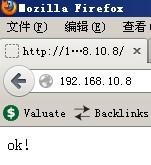
成功的话是ok!的输出,失败的话是bad!的输出,我这里是成功的,如图

好了,就到这里吧.
声明: 此文观点不代表本站立场;转载须要保留原文链接;版权疑问请联系我们。


