本篇分享了128M小内存VPS主机安装LNMP服务器环境,希望对于初学Nginx服务器相关的朋友有帮助,更多Nginx安装、配置、报错处理等资源请本站内搜索。。
从lnmp.org下了一键安装包。可是尝试无数次都失败。最后看log发现是mysql安装失败。nginx和php都编译并安装,唯独mysql编译的时候out of memory了。于是想用一键安装包的脚本安装nginx和php等软件,mysql用apt-get安装。研究下了一键安装脚本,发现过于繁琐,虽然lnmp.org提供的一键安装包省事而且也能提高网站的访问体验,但是系统开销是很大的。
找来找去无意中看到了一个很神奇的脚本lowendbox的lowendscript。研究下了果断决定用这个脚本安装。
下面是LEB脚本包含的软件和对系统的修改
安装/替换的软件
dropbear to replace openssh. Invoked from xinetd.
inetutils-syslogd to replace rsyslog.
exim4 to replace sendmail (if installed). Re-configured to allow Internet delivery.
cron
nginx
mysql. Re-configured to remove innodb support, remove query cache and reduce key buffer size.
php with built-in FastCGI interface. Running only 1 child process and respawn after 5,000 requests.
对系统/软件的修改:
Removing some commonly bundled applications that should not be there in the first place for a minimal distro (apache2, sendmail, bind9, samba, nscd, etc).
MySQL root is given a new password (which can be found in ~root/.my.cnf)
Installing each WordPress site under /var/www/. It will create appropriate database, users and password for the site.
安装步骤:
1.下载lowendscript
wget –no-check-certificate https://github.com/lowendbox/lowendscript/raw/master/setup-debian.sh
2.优化系统
bash setup-debian.sh system
其实该命令包含:
remove_unneeded//移除不必要的组件,具体请参考脚本
update_upgrade//apt-get update 和upgrade
install_dash//安装dash代替bash
install_syslogd//安装轻量级syslogd代替rsyslog
install_dropbear//安装dropbear代替openssh
3.安装exim4代替sendmail
bash setup-debian.sh exim4
4.安装Nginx
bash setup-debian.sh nginx
5.安装PHP
bash setup-debian.sh php
默认开启一个php-cgi进程,修改方法:
echo “PHP_FCGI_CHILDREN=3″ > /etc/default/php-cgi
6.安装MySQL
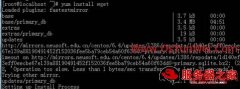
bash setup-debian.sh mysql
root密码存放在/root/.my.cnf
我安装完重启mysql会报错Access denied for user ‘debian-sys-maint’@'localhost’ (using password: YES),解决办法:
cat /etc/mysql/debian.cnf
查看到相关的passwod,替换下面的$passwod
GRANT ALL PRIVILEGES ON *.* TO ‘debian-sys-maint’@'localhost’ IDENTIFIED BY ‘$passwod’ WITH GRANT OPTION;
7.安装Wordpress
bash setup-debian.sh wordpress $domain
这步除了安装wordpress文件,还会建立名为$domain的数据库,修改wp-config.php里的信息。并在/etc/nginx/sites-enabled/下建立名为$domain.conf的配置文件。注意该配置文件和普通的配置文件有点区别:
一般的nginx会使用php-cgi监听TCP port localhost:9000,典型配置为:
location ~ .php$ {
root /usr/share/nginx/sites-enabled/$host;
fastcgi_pass 127.0.0.1:9000;
fastcgi_index index.php;
fastcgi_param SCRIPT_FILENAME /usr/share/nginx/sites-enabled/$host$fastcgi_script_name;
include fastcgi_params;
}
但是lowendscript 使用unix:/var/run/www/php.sock for FastCGI。作者说Unix domain socket is slightly faster and good enough for a single box setup.
所以$domain.conf配置文件里只有简单一句include /etc/nginx/fastcgi_php;
我在安装wordpress时发现无法加载css和图片,解决办法是在上面的配文件里加上:
location ~ .*.(gif|jpg|jpeg|png|bmp|swf|js|css)$
{
root $pwd;
if (-f $request_filename) {
expires 1d;
break;
}
}
另外附上Nginx下WordPress的固定链接&伪静态设置:
lnmp的/usr/local/webserver/nginx/conf 下面已经有了 discuz.conf 和 wordpress.conf文件,它们和nginx.conf在同一个文件夹。
编辑/usr/local/nginx/conf/nginx.conf文件
include discuz.conf; 或者 include wordpress.conf;
如:
server
{
listen 80;
server_name www.server110.com;
index index.html index.htm index.php;
root /home/wwwroot;
include wordpress.conf;
location ~ .*.(php|php5)?$
{
fastcgi_pass unix:/tmp/php-cgi.sock;
fastcgi_index index.php;
include fcgi.conf;
}
location /status {
stub_status on;
access_log off;
}
然后执行如下命令重启lnmp即可:
/root/lnmp restart
或者只重启 nginx 用命令:
/etc/init.d/nginx reload
UPDATE1:怪不得BuyVM的VPS都抢,同样是128MB的内存,BuyVM的VPS就能编译通过lnmp.org的一键安装包,而123Systems的就不行。
UPDATE2:脚本下载地址:setup-debian.sh
声明: 此文观点不代表本站立场;转载须要保留原文链接;版权疑问请联系我们。